How to add a shared calendar to the Outlook Web App (OWA)
Before you proceed, it’s important to make sure you have the necessary permissions to access the shared calendar. Now that you’ve confirmed your permissions, follow these steps to easily add a shared calendar to your Outlook Web App (OWA):
- Access OWA
Sign-In to the Outlook Web App (OWA) by opening a web browser and going to https://outlook.office.com/mail/ and using your Microsoft 365 credentials.
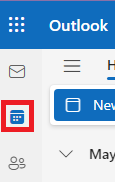
- Calendar
Click the Calendar icon in the OWA interface.
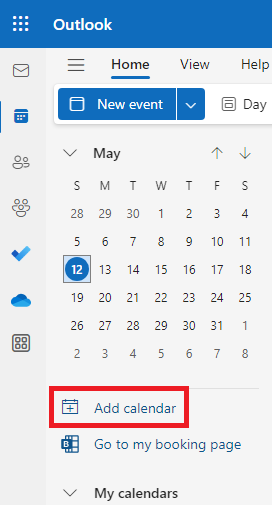
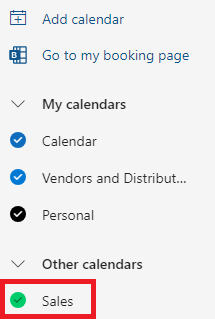
- Add calendar
In the navigation pane, locate Add calendar and click on it.
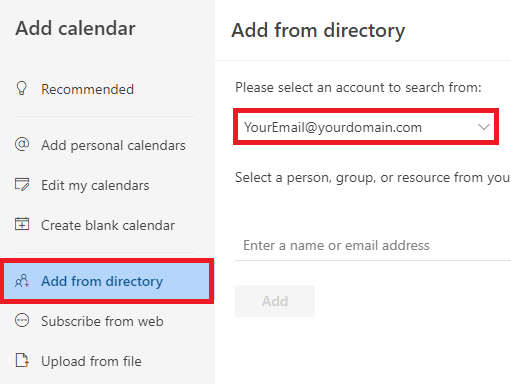
- Add from directory
A pop-up window will appear. Select Add from directory and then select your account from the dropdown list.
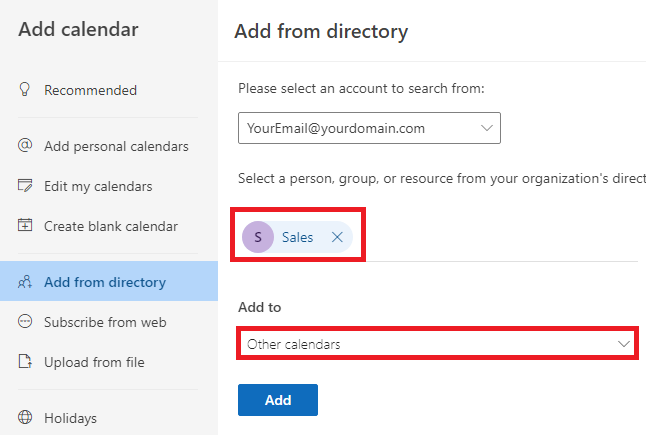
- Enter the calendar name or email address
Type in the email address or name of the shared calendar you want to add and select it from the results. Also, select the area you would like the calendar to appear in (e.g. Other calendars). Finally, click on Add.
- Locate the added calendar
The added calendar will be displayed under the group selected in the previous step. Users can use the circle icon before the calendar’s name to hide/show the calendar.
Category: Outlook (Web App) Tags: Add shared calendar, Add shared calendar to OWA, how-to, Outlook Web App, owa, OWA Calendar